Improve Your Risk Assessment Mini Training – How To Write A Risk Assessment
I know where you are at. You’ve sent in your risk assessment and method statement and you want to start work on site. But your client has returned your paperwork and it’s not good enough and you’re not entirely sure why.
The Top 5 Reasons I return risk assessments and method statements to subcontractors for amendment are:
- The method statement does not contain a sequence of works explaining how the job will be done.
- The risk assessment does not address the risks that the sequence of works (if there is one) has identified.
- Work at height is not properly managed (ie. tower scaffolds, but with no one trained to erect or inspect one, the hierarchy of control has not been applied).
- Document does not detail substances to be used (or have coshh assessments attached) or does not have an equipment register.
- Emergency contact details are not included or there is no emergency procedure.
Remember that your risk assessment and method statement are legal documents.
Your client has a legal duty to ensure it is suitable and sufficient.
You have a legal duty to protect not only your employees, but others affected by your works.
You will also be relying on both documents in the event of a personal injury claim.
If you have been told to improve your risk assessment and method statement, then this post will serve as a short training course to instantly improve your risk assessment documents.
This post will take you through the process of writing risk assessments and explain:
- The importance of Risk Assessments
- The Meaning of Reasonably Practicable, Suitable and Sufficient
- Scoring System Methodology
- Identifying Hazards
- Identifying the Potential Harm
- Determining Likelihood
- Designing Control Measures
- The Hierarchy of Control
- Pro-Tips for Watertight Risk Assessments
Read through, then work through and I guarantee it will improve your risk assessment.
Let’s get started on improving your risk assessment.
Writing risk assessments is not a difficult task. Honestly, it’s not. It’s time consuming but overall, it’s a simple process with a simple formula.
- Examine the work process and identify the hazards
- Identify the Harm that could occur
- Decide how likely it is to happen
- Identify the control measures that need to be followed to reduce the risk
- Re-assess the risk
But there are SO many poor risk assessments that do not meet the grade.
Why Writing Risk Assessments is SO Important
Stick with me on this one. You can skip to the HOW TO if you must, but reading this may help you understand why your client is making such a big deal about this and WILL help improve your risk assessment.
Risk assessments are the foundation of Health and Safety Law in the UK. The duty placed upon employers is So Far As Is Reasonably Practicable and risk assessments are the “thing” used to demonstrate what is Reasonably Practicable. (There is one exception to this which is Machinery Guarding).
Definition of Reasonably Practicable as set out by Lord Justice Asquith in 1949
“‘Reasonably practicable’ is a narrower term than ‘physically possible’ and seems to me to imply that a computation must be made by the owner, in which the quantum of risk is placed on one scale and the sacrifice involved in the measures necessary for averting the risk (whether in money, time or trouble) is placed in the other; and that if it be shown that there is a gross disproportion between them — the risk being insignificant in relation to the sacrifice — the defendants discharge the onus on them. Moreover, this computation falls to be made by the owner at a point of time anterior to the accident.”
In plain English, you need to weigh up the benefit against the cost. If you are putting someone at risk of harm when a solution would cost very little then your solution is not reasonably practicable. If you are protecting someone but it is costing an absolute fortune, then your solution is also not reasonably practicable. If you are paying a reasonable amount, say the hire cost of a tower scaffold, to prevent someone falling off a ladder, this solution is reasonably practicable. Read on and I’ll explain this again.
Of course the purpose of the risk assessment is to make the work process as risk free as possible, but for the employer the risk assessment is proof that they are:
a) Meeting the Regulation 3 of the Management of Health and Safety at Work Regulations
b) Communicating risks to with employees
c) Taking steps to ensure Health, Safety and Welfare of employees whilst at work
d) Demonstrating that the Hierarchy of Risk Control is being implemented
e) Reviewing health and safety arrangements
The risk assessment will also come under scrutiny in any Health and Safety Interventions or personal injury claims. So those paying lip service to the risk assessment process are likely to suffer greatly if their risk assessment is not found to be suitable and sufficient.
What is Suitable and Sufficient when it comes to writing risk assessments?
Suitable and sufficient is the standard required by Regulation 3 of the Management of Health and Safety at Work Regulations. But what does suitable and sufficient actually mean when it comes to writing risk assessments?

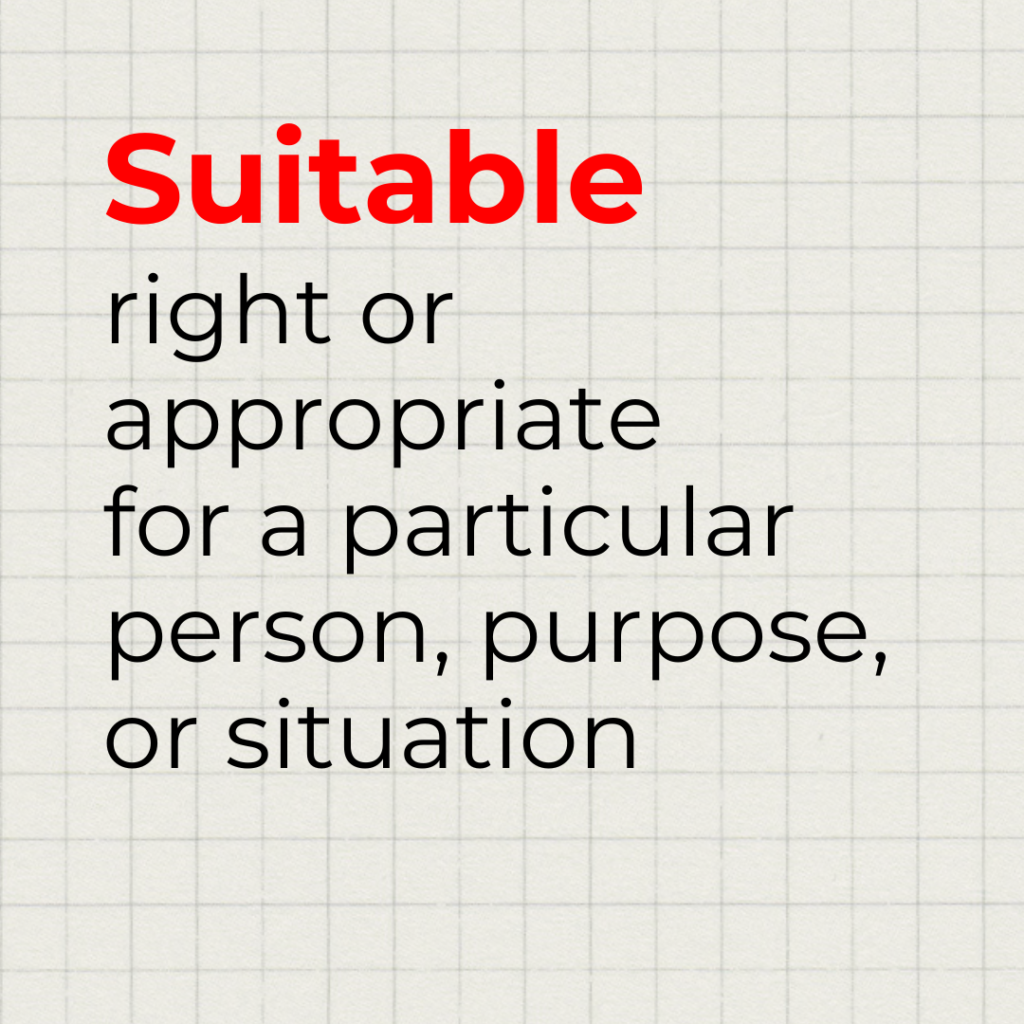
Definition of Suitable:
right or appropriate for a particular person, purpose, or situation
So, is the risk assessment:
- For the correct task?
- Easy to understand?
- Are the hazards realistic and not exaggerated? (not every workplace hazard has the potential for a fatality!)
- In the employees first language?

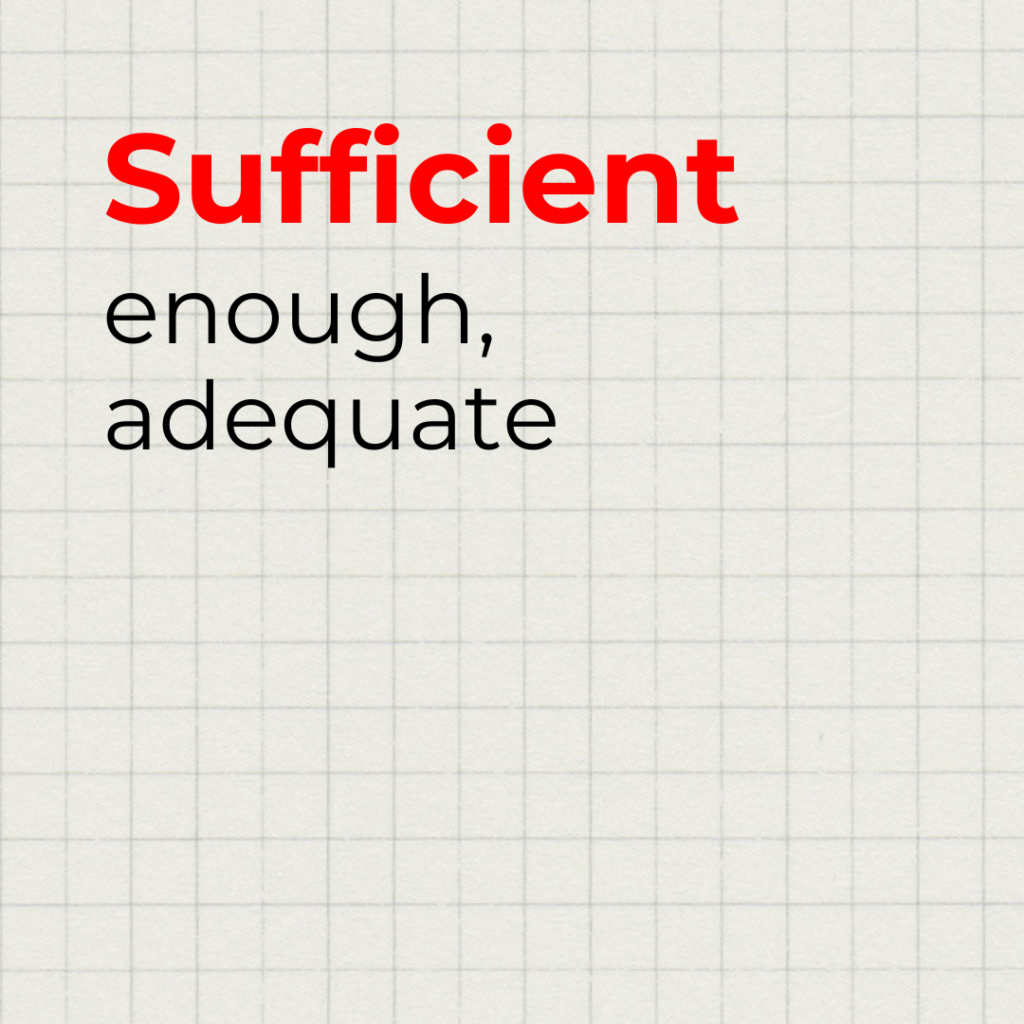
Definition of Sufficient:
enough; adequate:
When writing risk assessments, ask yourself the following questions…
- Does it cover all the hazards presented by the task?
- Can the control measures be implemented?
- Are resources available to implement the control measures?
- Do the control measures go far enough to reduce the risk to the individual?
- Could any further control measures be taken to reduce the risk further?
High, Medium, Low or 1, 2, 3, 4, 5?
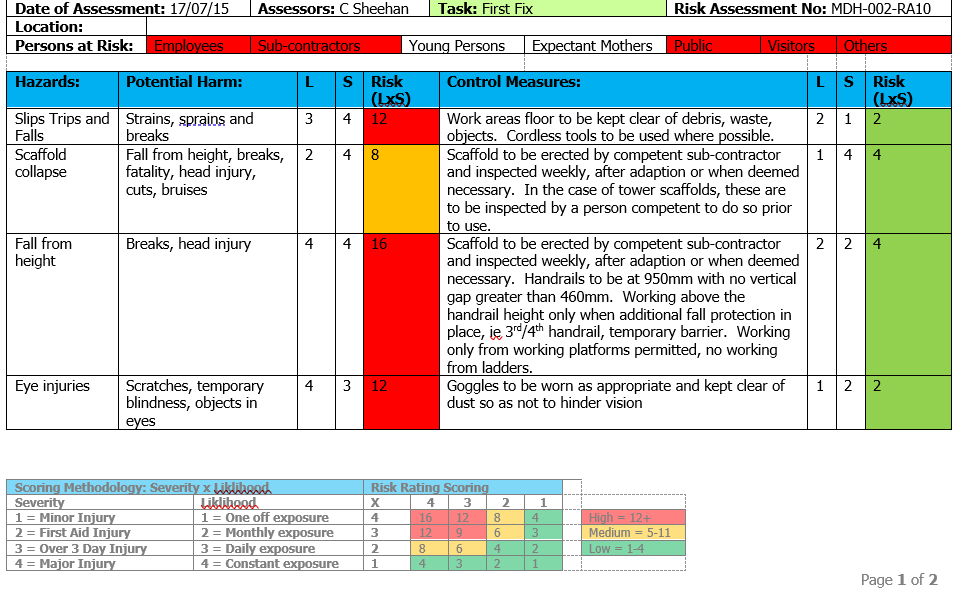
The scoring of a risk assessment is not vitally important. It just needs to be some way of classifying the risk levels. So High, Medium and Low is a subjective way of doing this. A more objective method is to set out what each score represents. This is the scoring I use in my risk assessments.

Humans tend to choose the middle ground. In surveys on the following scale, 3 tends to be chosen the most.
1- Very Poor
2- Poor
3- Acceptable
4- Good
5- Very Good
When it comes to Risk Assessment scales its always a good idea to have no middle ground and clear definitions of what each score means. This makes the control measures effect have meaning. For example if painting the front of a house is undertaken entirely from ladders, the likelihood of a fall from height and a major injury is a 4 and 4. If the painter works from scaffold, the likelihood is reduced as they are working with a guard rail around them.
Now let us move on to actually writing to Improve your risk assessment.
Identifying the Hazards Will Improve Your Risk Assessment
One of the biggest mistakes risk assessment authors make is presuming they know the hazards associated with the job. The only watertight way to get this step right is to take time to watch the process and identify the hazards.
As a Risk Assessor develops their skills and knowledge, watching the same process over and over is unnecessary but the work place can be an unknown which poses a particular problem for authoring site specific risk assessments.
Principal Contractors are often reluctant to allow a subcontractors Risk Assessor in to survey a building or workplace. The pressures and time constraints of the construction project simply don’t allow for surveying time after the commencement of the project. Despite the requirements of the CDM 15 Regulations, it is still unusual for a subcontractor other than the Groundworker or Demolition contractor to receive the Pre-Construction Information Pack. To stand a fighting chance of making the risk assessment site specific, you must insist on some information relating to the site. The basic details you need to know to identify the hazards are:
– Site Delivery Arrangements
– The Traffic Management Plan
– Access to the Workplace
– Arrangements for Working at Height
– How materials are handled to and in to the Workplace
– Overlap with Third Parties
– Public Protection Arrangements
So, to be able to thoroughly identify the hazards, the Principal Designer must issue the Pre-Construction Information Pack to all subcontractors.
Identify the Harm that could occur
This is a little easier, as it is the knowledge of the Risk Assessor that is put to the test here. This often identifies to the person appraising the risk assessment if the risk assessment has been written by an inexperienced author as pretty much everything his high risk and a ends in a fatality!
Freak accidents do occur but the risk assessment process is designed to address realistic risks. Working from a mobile tower scaffold, 5 metres up without handrails could indeed result in a fatality or at best a major injury. Working from ladders for 15 minutes with the individuals foot height at 750mm, could indeed in some cases result in a fatality, but in the majority of cases it would be a major or minor injury. When identifying harm, it is important that it is realistic.
By identifying a realistic harm, the risk assessment has more credibility with the workforce. The risk assessment has to be communicated to them and if they feel the identified harm is exaggerated, then they may also assume that the control measure is also exaggerated therefore they may only comply to the level they feel necessary.
The potential harm also needs to be realistic in order to produce a realistic risk rating score. Using my scale, or you can use your own, I’ve labelled the scores dependent on the accident level, so Major Injury, Over 7 Day Absence, First Aid Injury or a Minor Injury. This is a sensible way to put a numerical value on the potential harm. The scale can be High, Medium or Low, or it can be more than four numbers. It’s your risk assessment and it needs to be something you know inside out and are confident in using.
Decide How Likely it is that the Harm will Happen
I find the easiest way to determine the likelihood is to have a tangible scale. Below is a reminder of the scale I use.

By having a tangible scale on this, it makes this the quickest and easiest part of writing risk assessments.
I was told very early in my training that you can’t legislate for idiots – this is very harsh, but very true. Don’t up the likelihood score for the accident prone member of the team – instead have a competent person undertake the task. All employees have to be competent to undertake the duties they are given as part of their day to day responsibilities within their job. If an individual is more likely to have an accident, they need to be doing something else they are competent to do until they have the sufficient skills, knowledge, training and information they need to undertake the task competently.
By multiplying the Severity by the Likelihood, the Risk Rating has been established. Now the work is to reduce this to a tolerable level by implementing control measures. The general standard we are working to is reducing the risk so far as is reasonably practicable, so going back to the words of Lord Justice Asqwith; The quantum of risk (the risk rating you have placed upon it by the harm v likelihood calculation) must be outweighed by the sacrifice made to reduce the risk – ie. The Control Measures which must be implemented.
Identifying Control Measures to be Implemented to Reduce the Risk and Improve Your Risk Assessment
The Management of Health and Safety at Work Regulations outline the Hierarchy of Control to be followed to reduce risk. An effective, suitable and sufficient risk assessment will demonstrate how each element of the Hierarchy has been considered in turn. The starting point is always elimination.
Management of Health and Safety at Work Regulations – Hierarchy of Control
Elimination
When you are writing risk assessments you need to answer the question “can the hazard be eliminated?”. This means looking at whether the work have to be done that way? Window cleaning is an excellent example. The window cleaner is at risk of falling from their ladders when working at height. Eliminate the risk by cleaning by pole brush with the window cleaners feet staying firmly on the ground. There is no work a height, therefore no risk of a fall. The alternative risks presented by cleaning by pole brush are far less than the risk of falling from height.
Reduction
The reduction can be in terms of reducing the likelihood of exposure or reducing the exposure time. An example of this is the use of equipment which presents a hand arm vibration risk. The risk can be reduced by using a piece of equipment which produces less vibration, if one is available, or the time the individual is exposed to the vibration risk can be reduced by having the task resourced by more than one individual.
What is important to remember when deciding on the most appropriate control measure, is to ensure that the step above on the hierarchy of control must be completely exhausted before considering the next option. Taking the same example of using equipment that presents a hand arm vibration, the option for reduction would only be explored if the task itself could not be designed to eliminate the use of equipment which produces a vibration risk.
Isolation
Isolating a risk is placing fewer people at risk. Joiners creating wood dust when cutting must use extraction units to prevent exposure to dust. The risk is not eliminated, it is reduced as there will still be some residual dust. To prevent unnecessary exposure, the joiners should have a separate area which is isolated from the rest of the workforce. Other tradespersons working on the same site do not need to be exposed to wood dust and by isolating the joiners cutting activity, this is reducing the risk to the other tradespersons. So this risk cannot be eliminated but it can be reduced and isolated.
Control
Engineering controls, such as the dust extractor mentioned previously, are examples of Controlling the risk to reduce both the likelihood of the harm occurring and the effects if it does. Machinery guarding would be considered as a control. Fixed guarding is controlling the hazard by ensuring the individual cannot come into contact with it.
Personal Protective Equipment
Personal protective equipment is always the last resort in protecting the individual as it can often be the least effective. The employer needs to make an effort to reduce the risk at the source. A suitable and sufficient risk assessment will show that the hierarchy of control has been worked through. The control measures devised from this process will be detailed followed by the necessary PPE which the individual is required to wear.
Discipline
No matter how good the risk assessment is, if an employee fails to comply with it then discipline is the only option. Every employee has a duty to co-operate with their employer under Section 7 of the Health and Safety at Work Act. The employee is legally required to comply with the arrangements their employer has put in place to discharge their health and safety responsibilities. If the employee is failing to follow the precautions put in place by the employer to ensure safety then the Human Resources procedures must be followed to address the situation. The failure to comply must be addressed promptly as the non-compliant employee could be placing other individuals at risk.
Re-assess the risk
When the control measures have been designed the risk level must be reassessed to demonstrate that either or both of the likelihood and severity have been reduced.
And this is how to make sure your risk assessment is Suitable and Sufficient. The process speeds up rapidly as your knowledge and experience grow. Here’s a few of pro-tips:

Pro-Tip 1 for Improving Your Risk Assessment: Know Your Enemy
They’re not really your enemy, but rather a Safety Manager doing their job. However, if you know what the person appraising your risk assessment is checking against, you can ensure that every single requirement is met when writing your risk assessments. Respectfully ask for a copy of their checksheet so you can ensure you are meeting the criteria and nobody’s time is wasted.
Pro-Tip 2 for Improving Your Risk Assessment: Meet Everyone’s Needs (particularly your own!)
The Risk Assessment is not just to get a tick in the box to start on site. A Risk Assessment is a legal document that will be scrutinised and examined in the event of a personal injury claim or a Health and Safety Executive Investigation, so the Risk Assessment must demonstrate that the employer is taking steps So Far as is Reasonably Practicable to ensure the safety of those affected by their undertaking.
I hope you have found this post useful. If you have any questions or need any help, get in touch.
Your Next Step to Improve Your Risk Assessment
Work through the advice in this post
If you need a risk assessment template – you can get one here
If this is all a little to much and you don’t have time, consider our retained health and safety service. I’ll write the site specific RAMS for you whenever you need them! Here’s the details.
If you just want a shove in the right direction, I can send you a weekly email that will prompt you to do little (and I mean little) tasks to keep your company off the HSE’s radar and at the forefront of potential clients tender lists! You can sign up here. You’ll also get a free health and safety policy statement template and a How To Do Your Own Safety eBook!

